Sensory activities help our children to understand the world around them using the five senses; taste, touch, smell, site and hearing.
Sensory bottles are one of the activities our teachers do with students in the classroom. They are a great option for engaging the senses of sight and touch with preschool age children, while also being very calming to look at once the project is complete. It’s a project that parents can easily do at home with their children, also.
It is fun to get creative with what items you put in your sensory bottle! The possibilities for items and themes for your sensory bottles are endless! Just use yours and your child’s imaginations.
Best of all, you can make a sensory bottle with your child that contains items that they are interested in. Does your child love animals? Use animal figurines! Does your child love the color yellow? Add some yellow food coloring! Even create a theme for your sensory bottle with your child’s favorite television show or movie characters!
You can pour into a water bottle a variety of small items that you find around your home or in a craft store. Just be creative! As you fill the bottle with your child, ask them how each item looks and feels. Best of all creating sensory bottles in an activity that you and your child can do together, while also engaging in conversation about what you’re doing and what they like best about it! Creating these bottles also allows you to engage other skills depending on your child’s age, which we have outlined, below.
If you need some help getting started creating sensory bottles, we are sharing six different types of sensory bottles that our teachers enjoy making in the classroom. You can easily make them at home using only a few materials, that are all easy to find.

Sensory Bottles
Materials:
Please note: All items are not needed for all sensory bottle options. However, you will need a bottle, tape and water to make all six sensory bottles.
- Baby oil
- Water
- Water or other type of bottle with a cap, you might also want clear tape to ensure the bottle remains closed at the end.
- Glitter
- Pom poms
- Food coloring
- Mini colorful rubber bands
- Mini shells
- Tiny fish, dolphin and shark figurines
- Water absorbing beads
Ocean in a Bottle
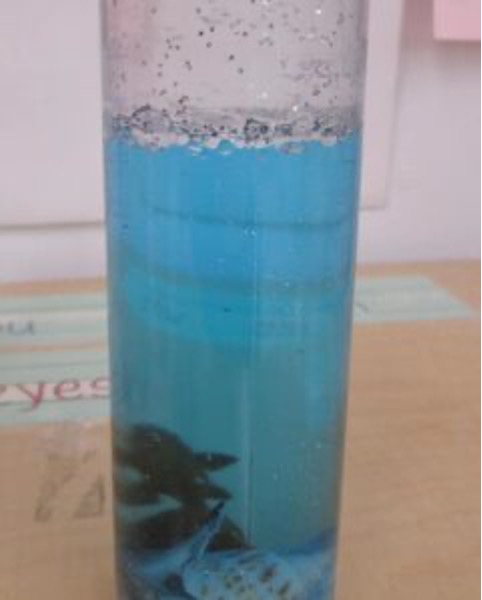
- Drop small shells, fish or other small ocean animal figurines into the bottle.
- Pour water into your bottle, almost to the top.
- Add 1 drop of blue food coloring to your bottle of water.
- Pour in baby oil to the top of the bottle of water.
- Close and seal the water bottle with clear tape.
This sensory bottle is great for a child who enjoys trips to the beach and to the aquarium!
Glitter in a Bottle
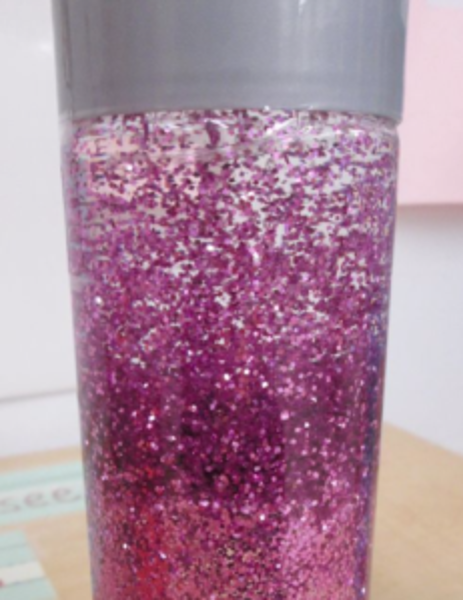
- Pour a small amount of glitter into your water bottle.
- Add water to the top of your water bottle.
- Close and seal your water bottle with clear tape.
You can create this sensory bottle over and over again by using different color glitter each time, or even a combination of glitter colors to create a brand new and interesting experience for your child.
Pom Poms in a Bottle
- Drop some pompoms into your water bottle.
- Add water to the top of your water bottle.
- Close and seal your water bottle with clear tape.
Turn this into a math activity by counting the number of pom poms you put into the water bottle, as you drop them in.
A Red Bottle
- Fill half of your water bottle with water.
- Add three drops of red food coloring to your water bottle.
- Add baby oil to the top if your water bottle.
- Close and seal your water bottle with clear tape.
This sensory bottle can be done with any color of food coloring. Ask your child what color they would like to make their sensory bottle to decide which color to use!
Rubber Bands in a Bottle
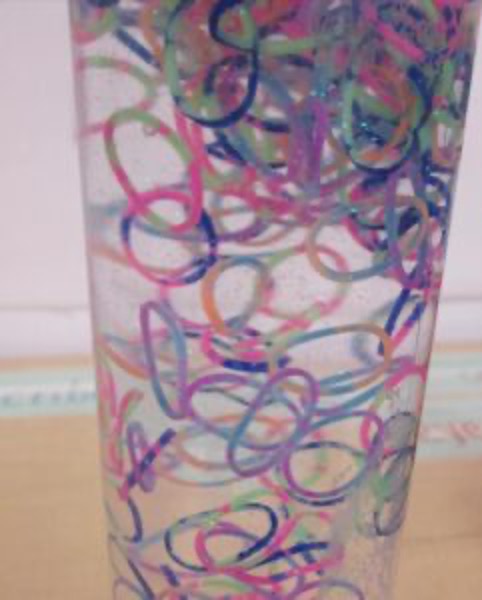
- Drop some mini colorful rubber bands into your bottle.
- Add water to the top of your water bottle.
- Close and seal your water bottle with clear tape.
Water Absorbing Beads in a Bottle
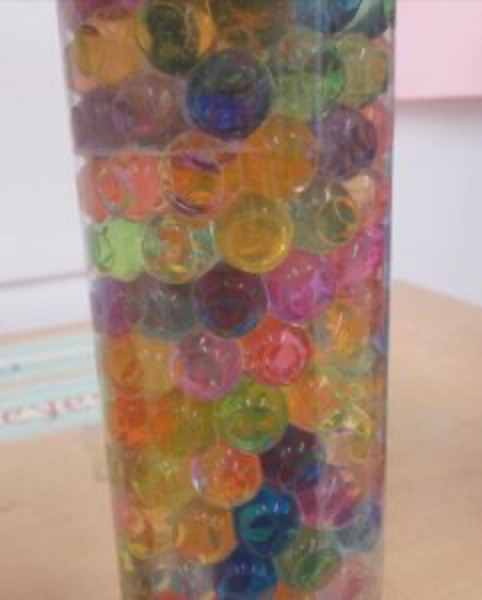
- Drop some water absorbing beads into a bowl.
- Pour water into the bowl.
- Allow some time for the beads to absorb the water in the bowl and grow.
- After the water absorbing beads grow, pour them into your water bottle.
- Close and seal your water bottle with clear tape.
If you have water beads in a variety of colors, turn this into a color identifying activity by asking your child what color each bead is as you drop them into your water bottle. You can also ask your child to explain what they saw happen to the water beads when you put them in the bowl of water.
Note: Water and baby oil do not mix. That is why these two liquids will separate in the bottle.
Once Your Sensory Bottle is Complete, Observe!
When your sensory bottle is complete, your child can shake the bottle, roll it around and flip it over to observe what is happening inside each one. Ask your child to describe in their own words what they see happening in each of the bottles as they move it around. If you make multiple types of bottles, ask them to tell you in their own words what is different about each sensory bottle, how they look and what happens when you flip them upside own.
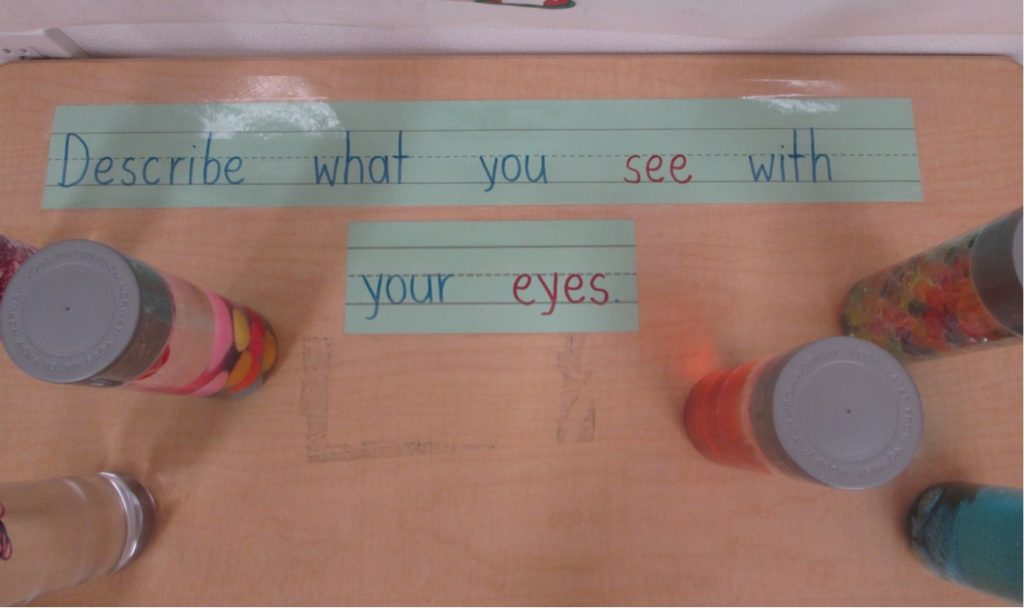
You can also change this part of the activity, according to the skills your child is working on. If your child is beginning to learn how to read and write, incorporate those skills! Write questions down for them, such as, “Describe what you see with your eyes.” Then, ask your child to write what they see on a piece of paper and read their response together, out loud.
Leave the bottles you create out at home for your child to play with and continue to roll, shake and flip over so that they can continue observing what is happening inside. Since the lid of the bottle is taped closed and secure, this is also a great way for your child to engage in sensory play without making a mess around the house.
Since this is an activity that allows you to change the materials you use in your bottle, it is certainly one that you can do with your child over and over without the activity every getting boring! After creating one or two sensory bottles, ask your child what items they would like to add to their next sensory bottle. You can even create a place in your child’s room or playroom to collect all of their sensory bottles to go back to play with and look at any time they would like to.
Build a Sensory Board
Further stimulate your child’s sense of touch by getting a poster board or piece of cardboard and gluing or taping items with different textures to the board. Have your child touch each of the items and describe how they feel. Which one feels bumpy, fluffy, soft, rough, scratchy and smooth? You can even ask your child which item they like the feel of, the most.
Items to consider including on your sensory board include small pieces of bubble wrap, sand paper, felt, large pompom, cotton round, Velcro (both sides) and aluminum foil. These items all have very different textures and will provide a wide variety of textures for your child to experiment with touching.
This is something else that can be put up in your child’s room or playroom to play with and experiment with, any time!
Incorporate Senses into Daily Conversation
When you are talking to your child every day, incorporate questions that require them to use and think about their senses. While you are out on a walk together ask, “What do you see?” When they pick up a leaf or run through the grass barefoot ask, “How does it feel?”
Questions like these are great ways to show your child that they are using their senses all the time to observe what is happening in the world around them. Asking these questions is also great when trying to extend the lessons created by making your own sensory bottles, into your child’s daily life.
For more fun activities like these, order CLC’s Play to Learn Book.
Children’s Learning Centers of Fairfield County (CLC) is committed to providing early childhood education for all families, with direct services and programs focused in health, nutrition & family support for children aged 6 weeks – 5 years of age. Find more information about enrollment, here!